Grade 10 Animation
UNIT:Robot Character Design
UNIT:Robot Character Design

Robot Character Design
This unit is about further developing your creativity skills, while incorporating the Design Process, our goal by the end of the 3 weeks is to have our own unique robot character design built into 3D form.
As previously introduced, we will start with the Research & Analyses stage to create our background story, then proceed to drawing simple shapes that will eventually be evolved into 3D forms. This process will certainly develop the identity of your character in terms of look, and form, giving it a reason to exist, creating a background story is absolutely critical in our design process. In the world of animation- "Story is King !"

Steps, Stages, Deliverables and Resources for this Project
Preparatory Work and DELIVERABLES:
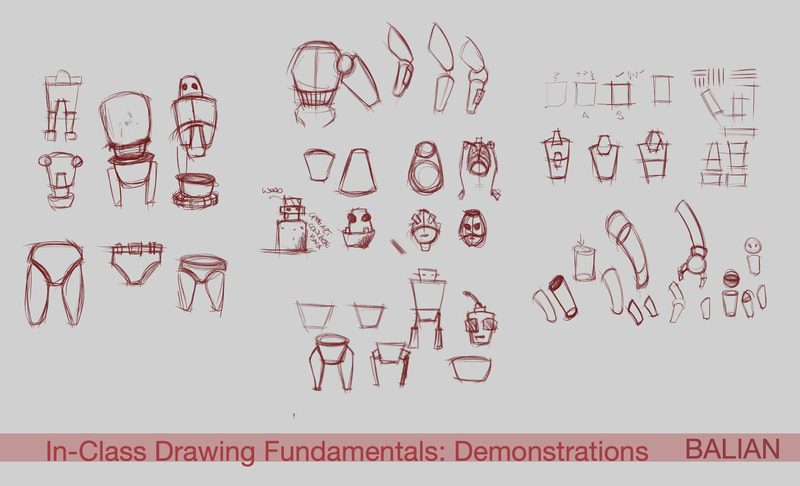
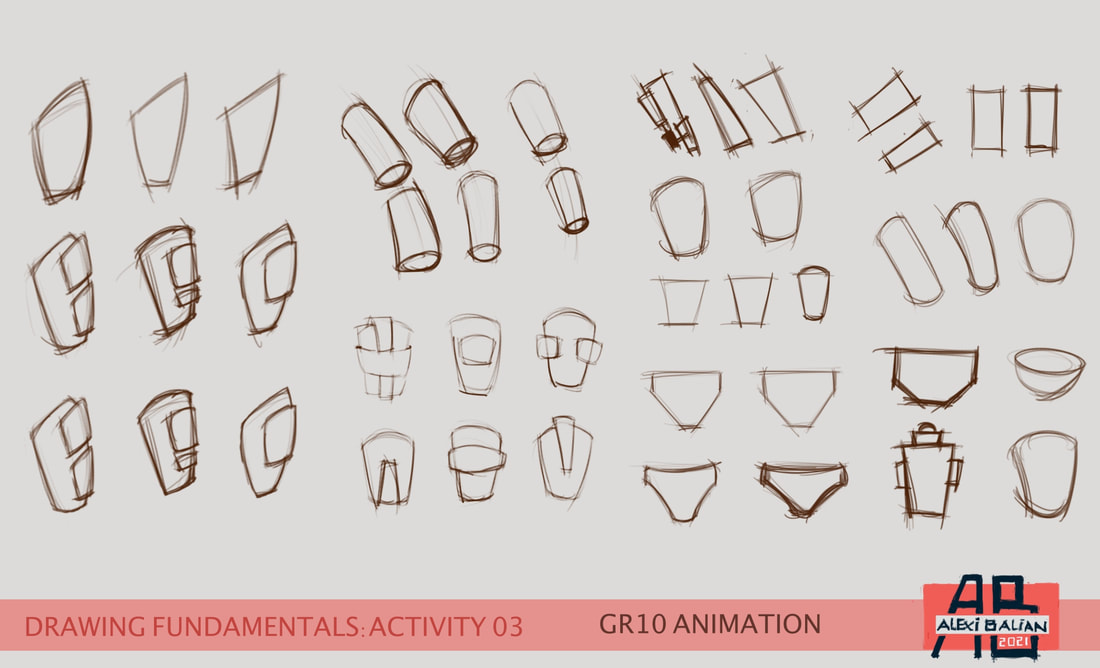
Drawing fundamentals Activity to Support Our Project
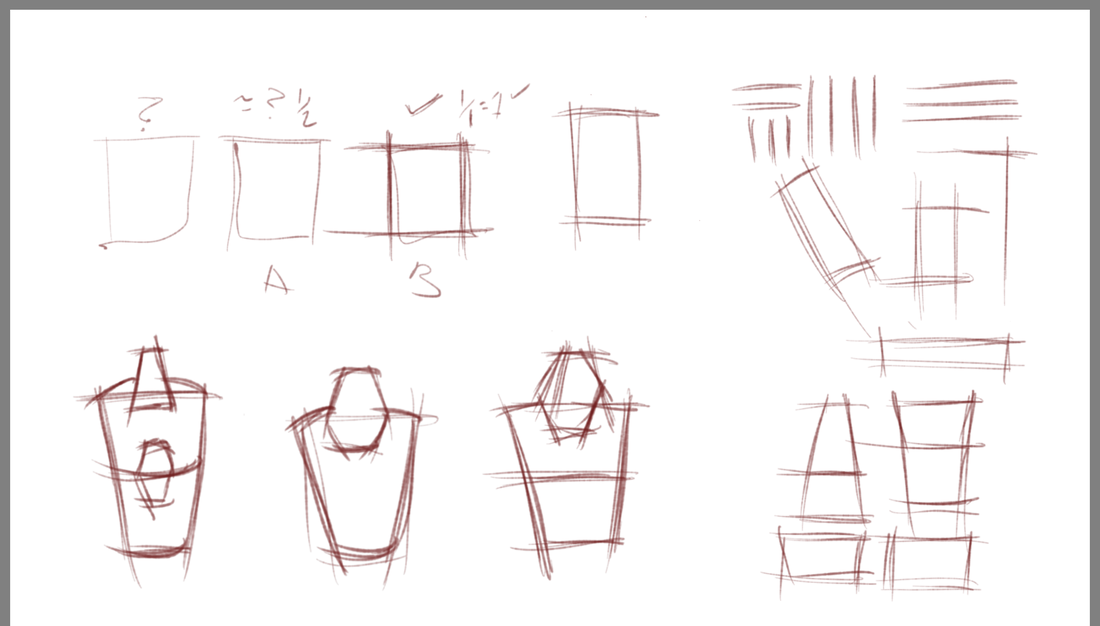
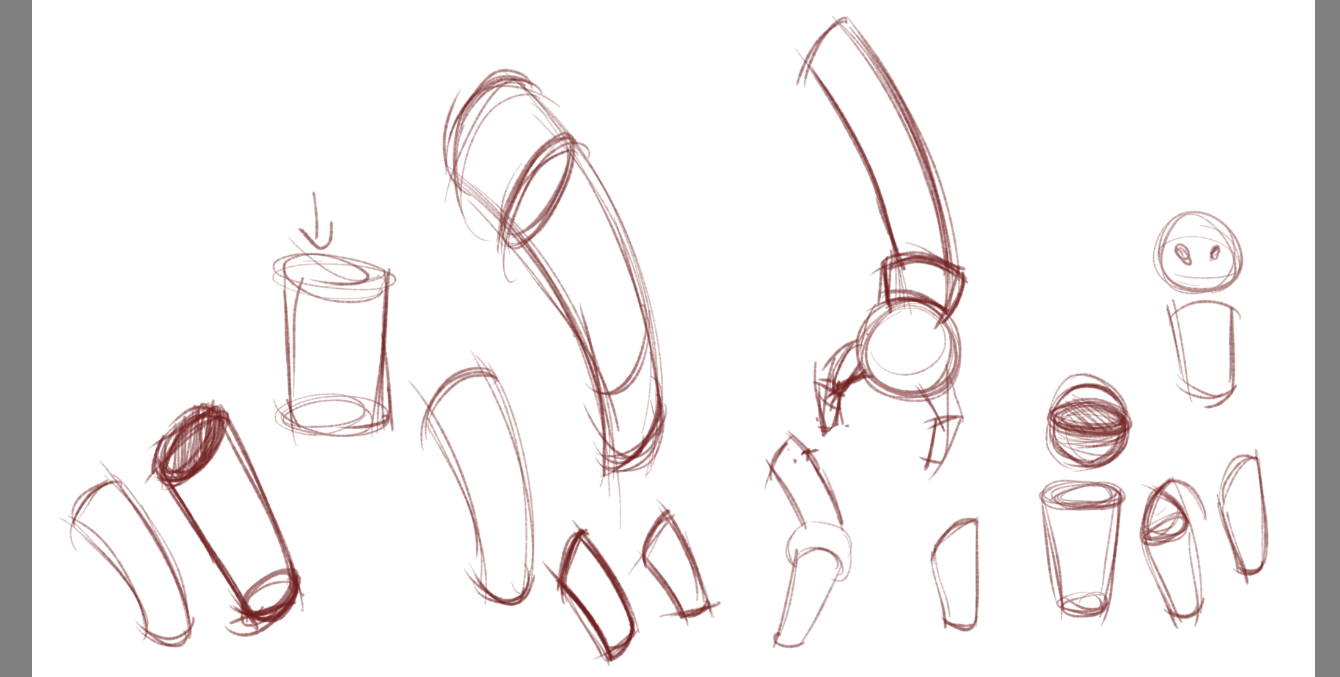
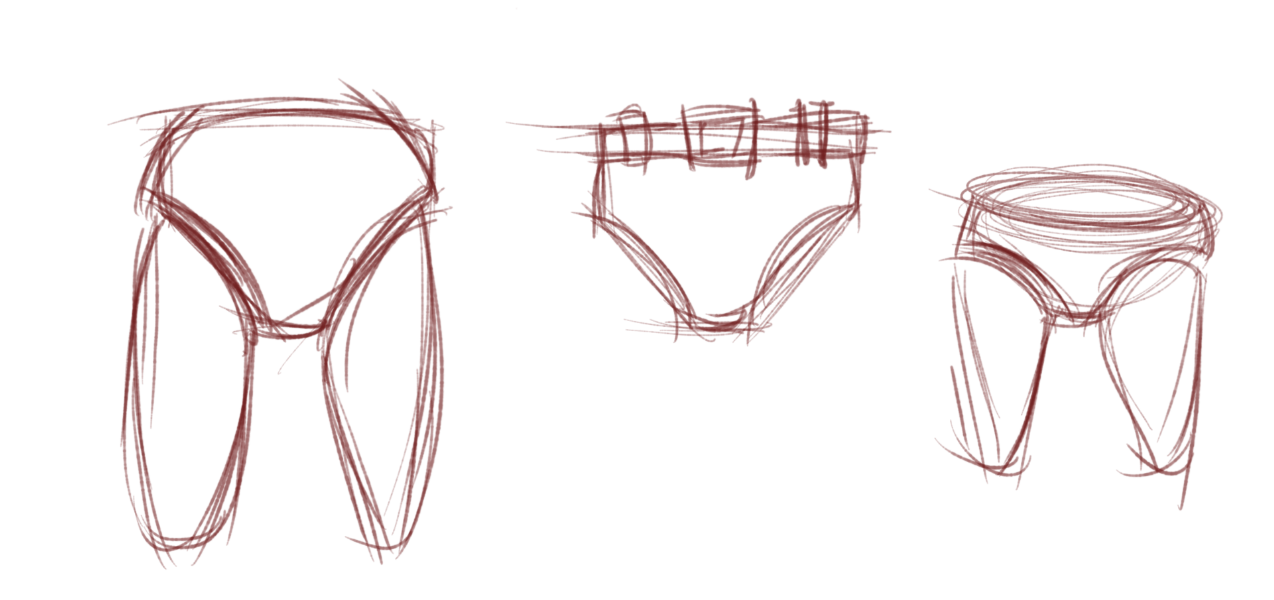
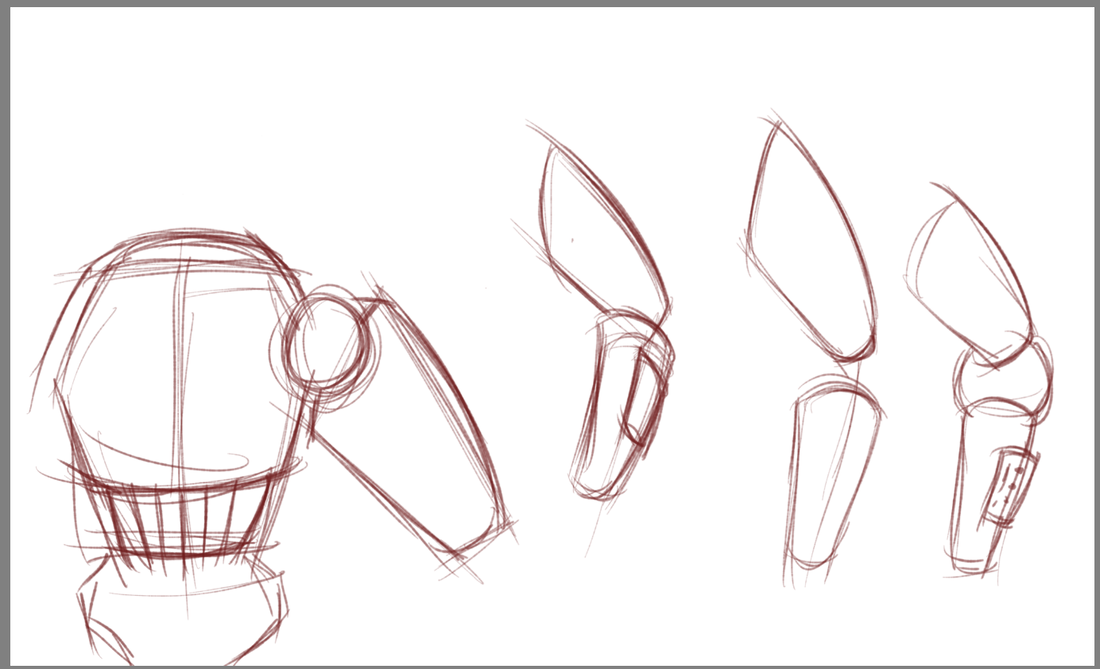
Robot Character Shapes
Found on Drawing Fundamentals Page
https://www.abalian.com/gr10-drawing-fundamentals.html
(Shapes and Robot Parts)
3D Modelling Introductory Activities
1-Blender Intro Activity 01 (Please Start Here)
https://youtu.be/iU6kqm7eTTU?si=GMe_mRwzMJ3dvYgY
2-Blender block-In Robot Parts (This will Help you build 3D modelling skills for this Project)
https://youtu.be/5VIRrEF9DI4?si=o2dfIRHbZHINPK5P
Stages of Our Character Design Process
All stages of our work, and my own exemplars can be found on my website.
https://www.abalian.com/character-designs.html
Research & Analyses Page
Robot Parts from Research
Robot Concept Sketches/ Designs from Parts
Robot Design (4-2-1)
Further Refinement
Biography of Robot with Concept Design
Creating a Google Slides Template
https://youtu.be/R-V7D26AkJ0?si=RX0eQ9Jh-TOAYPzM
Drawing fundamentals Activity to Support Our Project
Robot Character Shapes
Found on Drawing Fundamentals Page
https://www.abalian.com/gr10-drawing-fundamentals.html
(Shapes and Robot Parts)
3D Modelling Introductory Activities
1-Blender Intro Activity 01 (Please Start Here)
https://youtu.be/iU6kqm7eTTU?si=GMe_mRwzMJ3dvYgY
2-Blender block-In Robot Parts (This will Help you build 3D modelling skills for this Project)
https://youtu.be/5VIRrEF9DI4?si=o2dfIRHbZHINPK5P
Stages of Our Character Design Process
All stages of our work, and my own exemplars can be found on my website.
https://www.abalian.com/character-designs.html
Research & Analyses Page
Robot Parts from Research
Robot Concept Sketches/ Designs from Parts
Robot Design (4-2-1)
Further Refinement
Biography of Robot with Concept Design
Creating a Google Slides Template
https://youtu.be/R-V7D26AkJ0?si=RX0eQ9Jh-TOAYPzM

Stages of Our Work and Schedule: Total time in-class 3Weeks
Day 1 to 3: Research, Rough Concept Development, ending with your own 4-2-1 Process.
Day 4 and 5: Intro to 3D Modelling Activities
Day 6 and 7: Simple 3D Block-Outs of your Concept using our 3D Application
Day 8-10: Adding Bevel Edges, Extrusions, Simple Colour and Lighting
Day 10-12: Simple Animations of Object, Lights, and Camera Movements
Day 13- 15: Creating Our Final Package
Our Process and Stages: Robot Character Design Allocated Time: 7 Classes
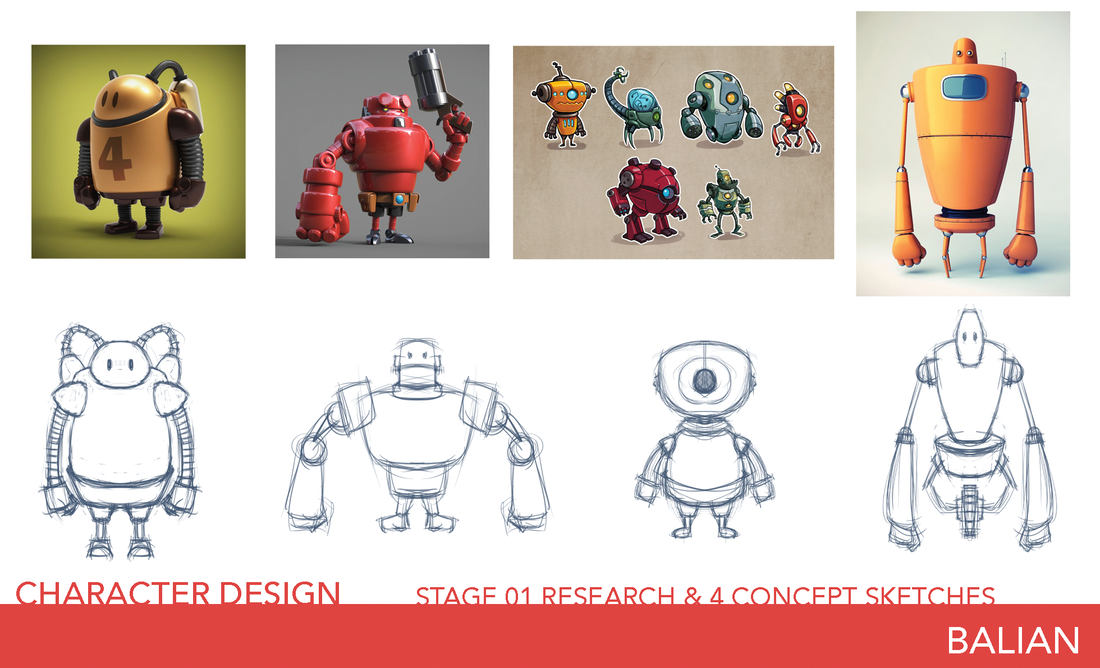
Stage 01:Research & Analysis (1 Day)
As per all our projects
Make connections to the items you downloaded and use those elements as a starting point for your Robot character Design
Stage 01a:Create a background Story of your Character (Day 1 to Day 2- evolved from your Research)
What is the purpose of your character, develop the background story and identity.
Further points to consider:
Is your Robot for a movie, a show, a domestic helper robot, make up a Background story- It will help you tremendously in the Design Process
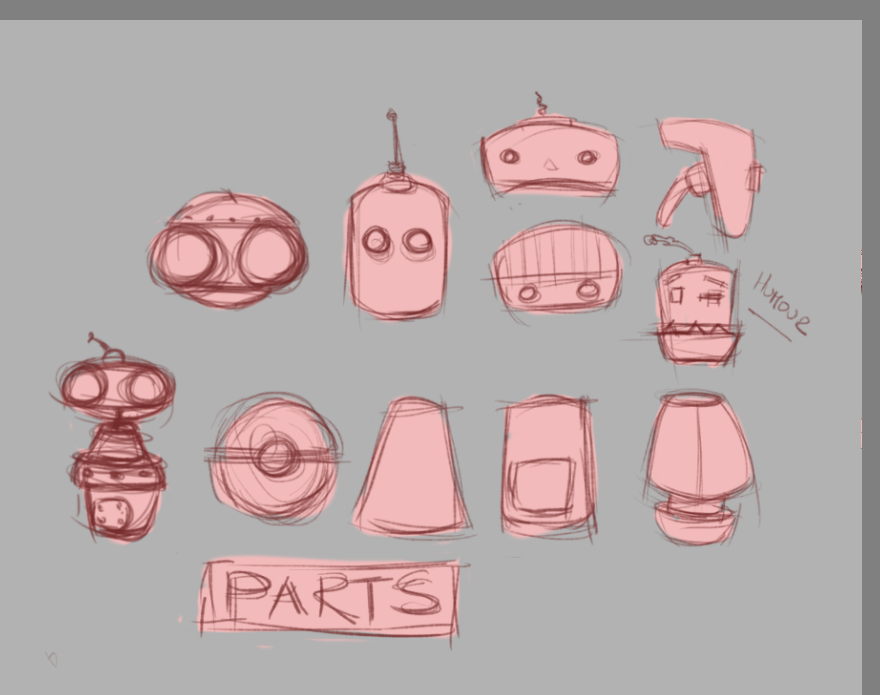
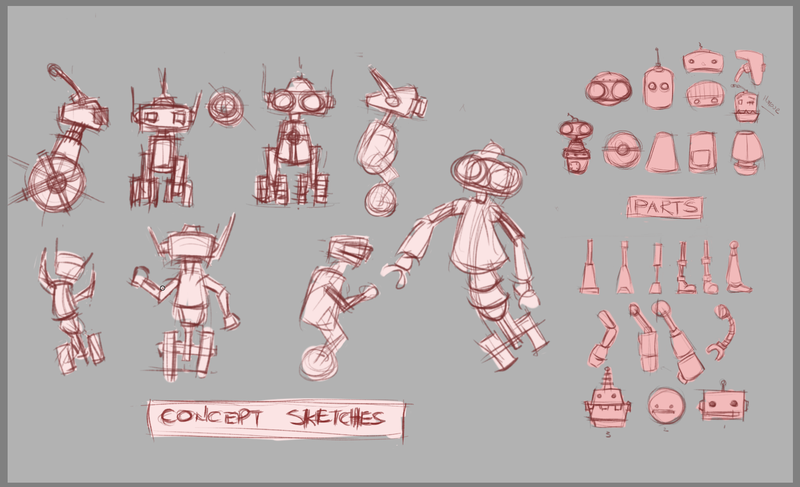
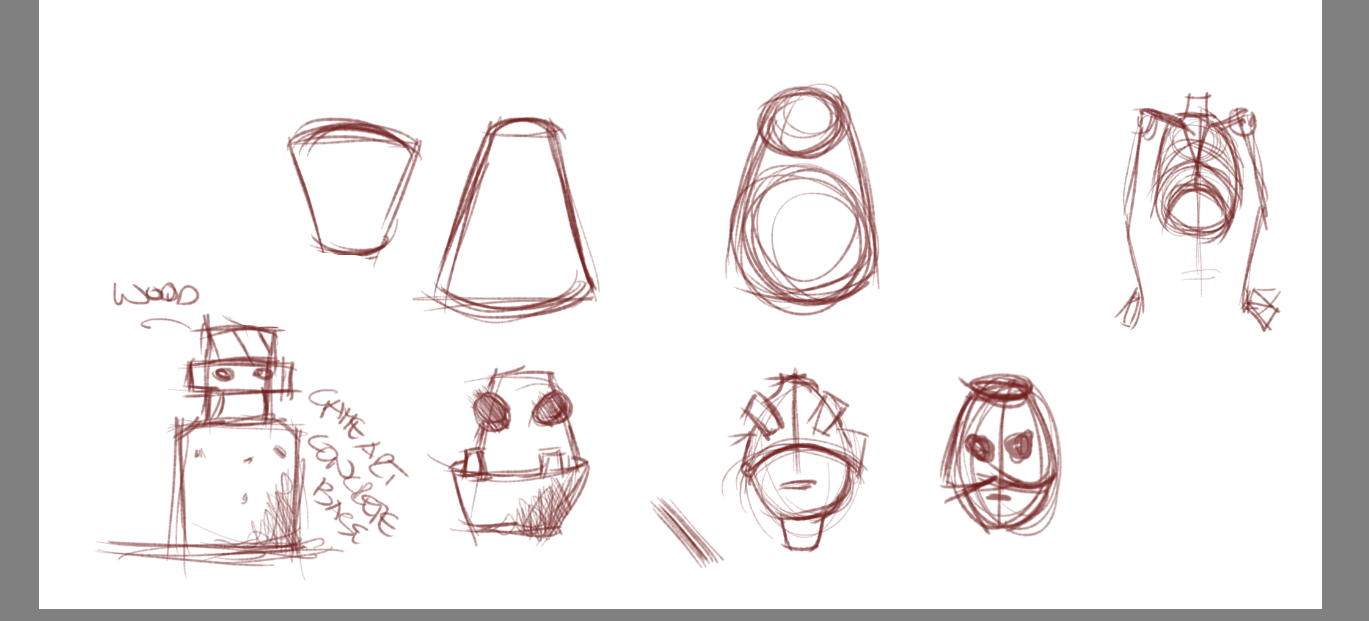
Stage 02:Elements that Make Up the Whole (1 Period of Class Time)
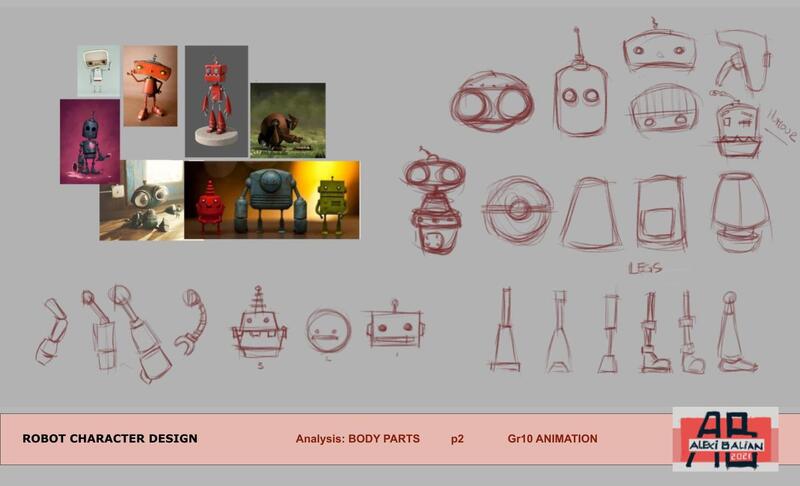
Draw simplified shapes from your reference page, robot parts that interest and inspire you to eventually incorporate into your Character Design Process.
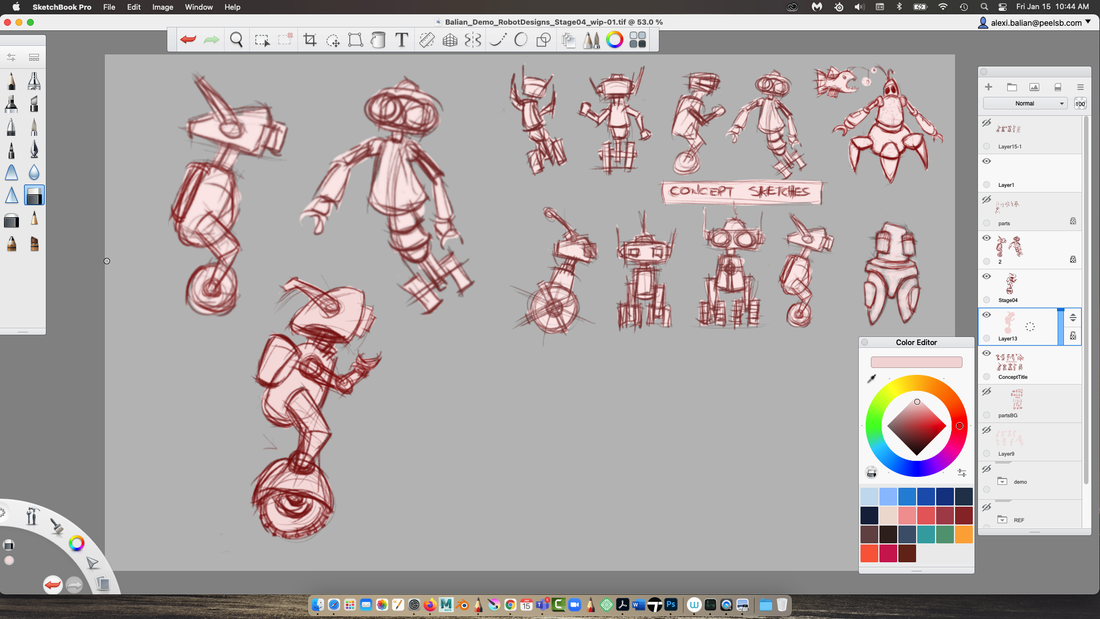
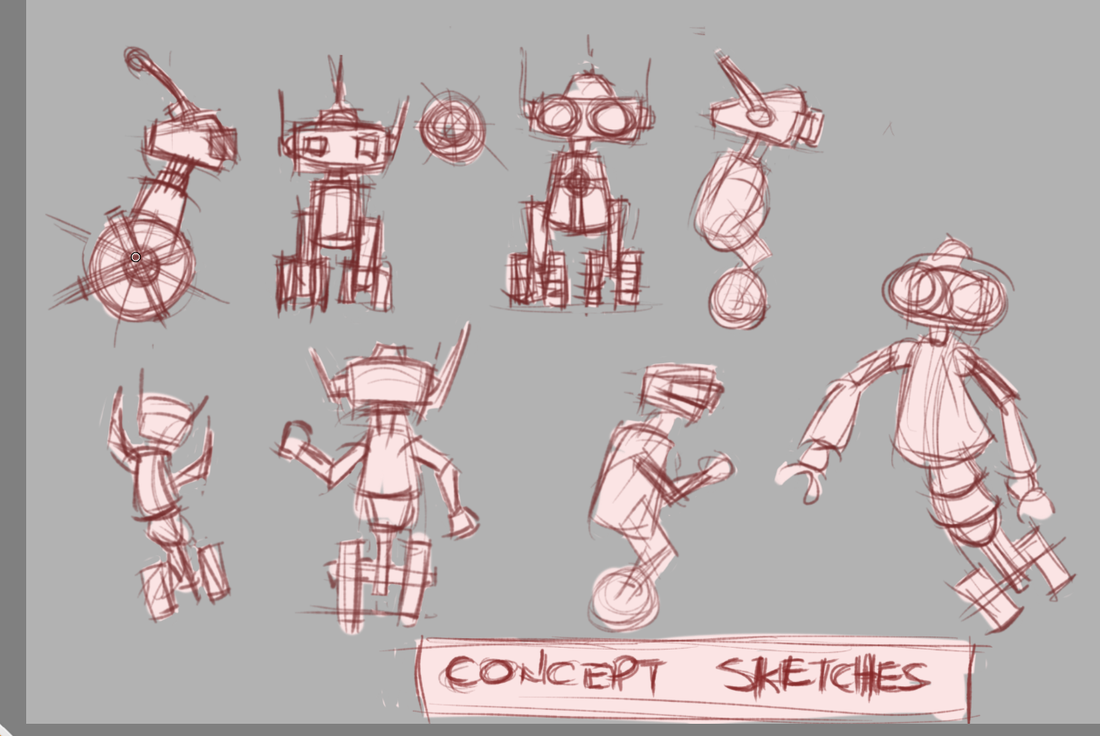
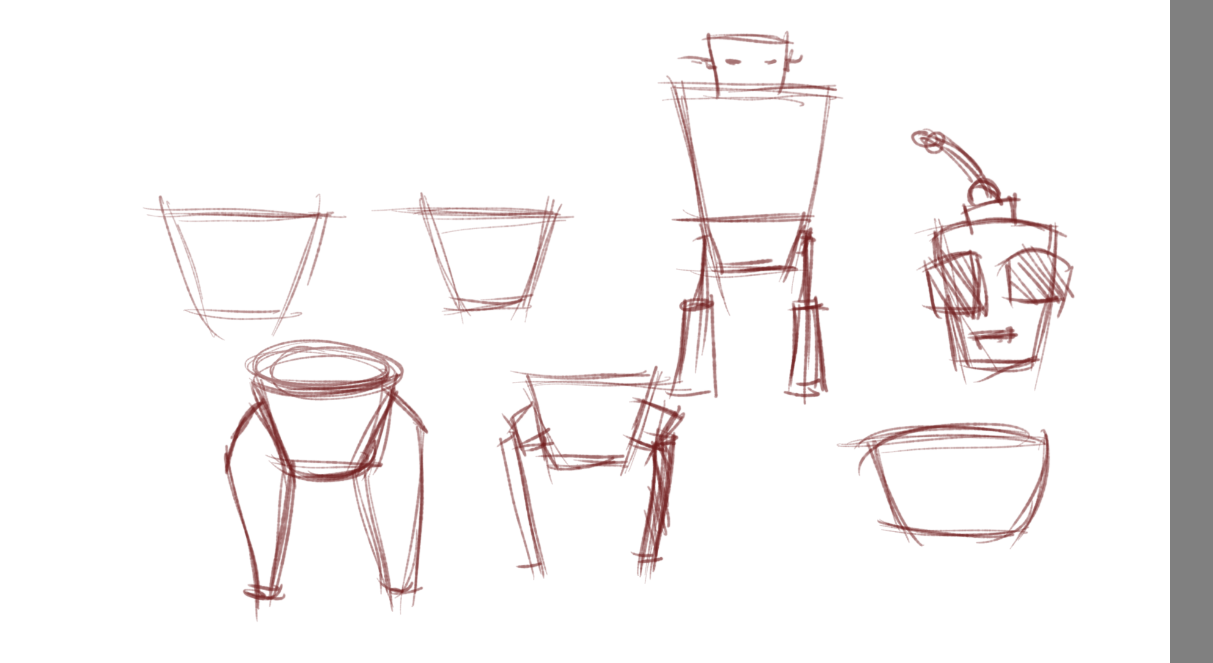
Stage 03:Concept Sketches "4-2-1" (2 Periods of Class Time)
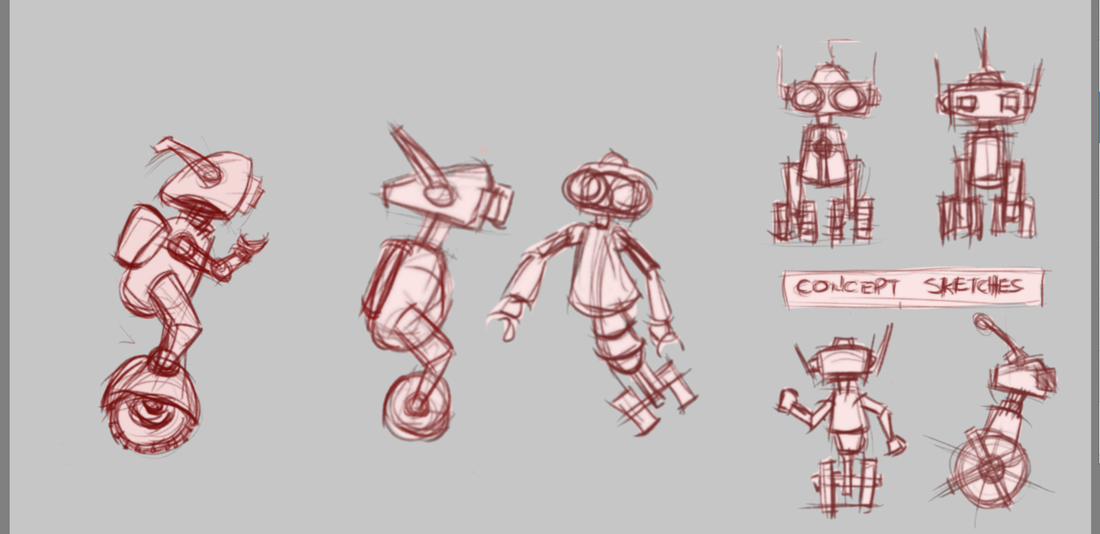
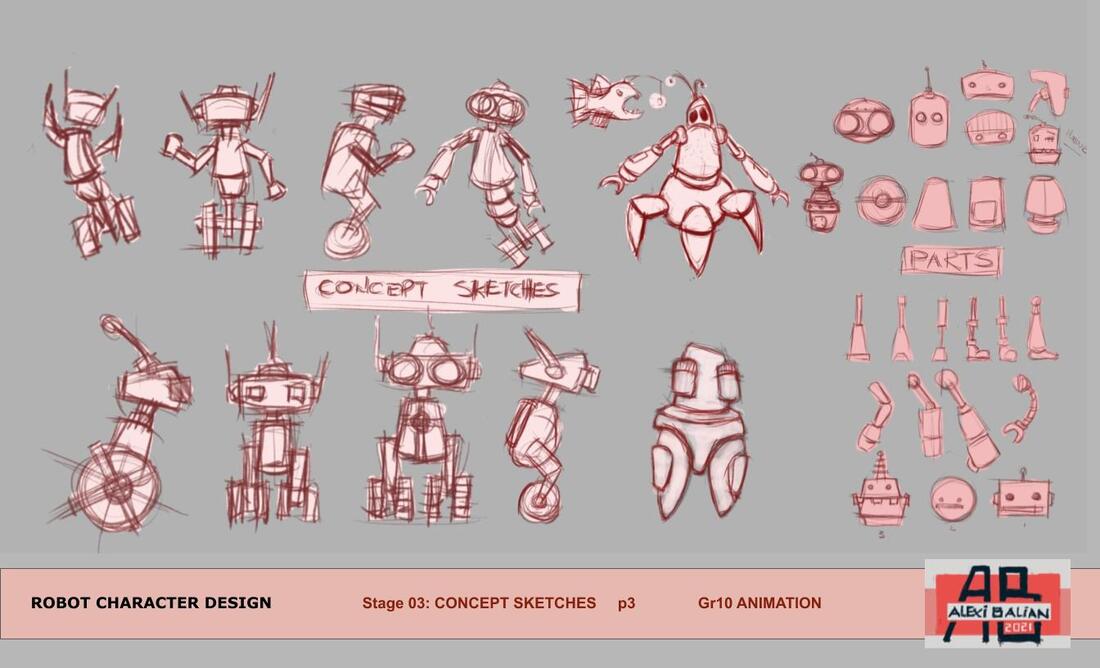
Building on your research, references, drawn body parts, and also the background story of your character, this is where you start working on producing thumbnail sketches. Start with Four initial ideas, evolve it to Two, then One, so that you can further refine in in the next stage.
Please enjoy this process, let your imagination run wild...:)
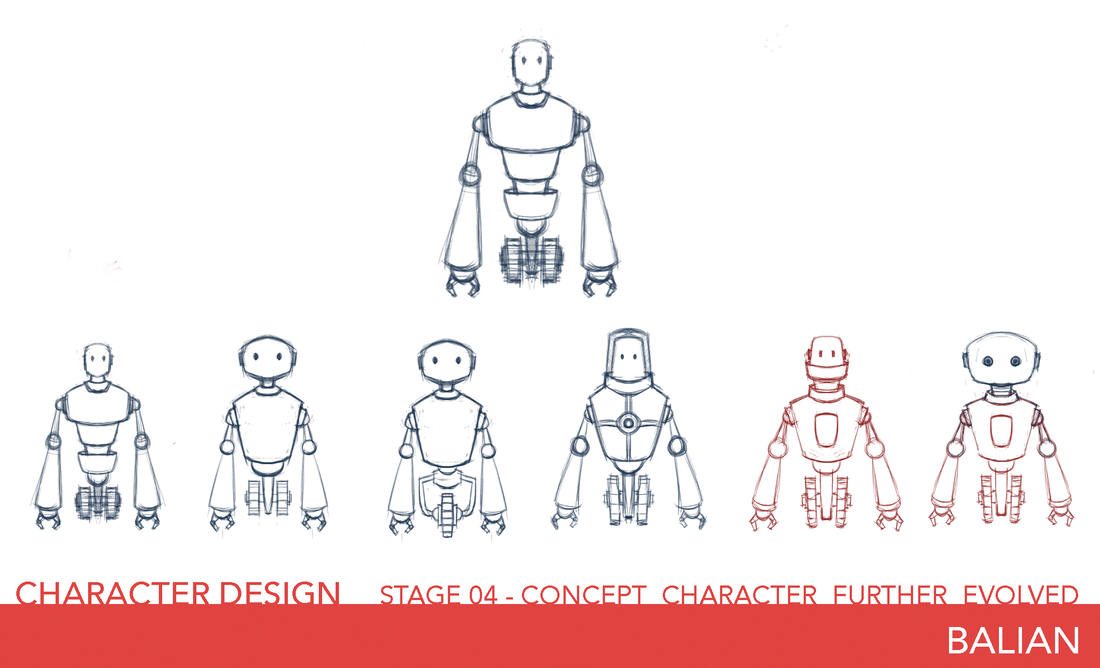
Stage 04:Further Refinement (1 to 2 Periods of Class Time)
At this stage, you can work on the One character design that you like most and further develop it, by adding details, parts, as much revisions and details to best connect with the background story of your robot character.
For example, as far as my own robot, this is the stage where I will be exploring if my robot has a telescopic mid section, that could raise and bend the upper body of my bot. I am thinking of adding a Utility Belt, Jet Pack, as well as a Backpack since this is a First Aid Robot. I may spend a bit more time refining what the face looks like, the connections between all body parts, remembering each time for me to draw my character many times over, as opposed to adding and then erasing every change I make.
Stage 05:Proposed Character Design & Final Package (2 to 3 Periods of Class Time)
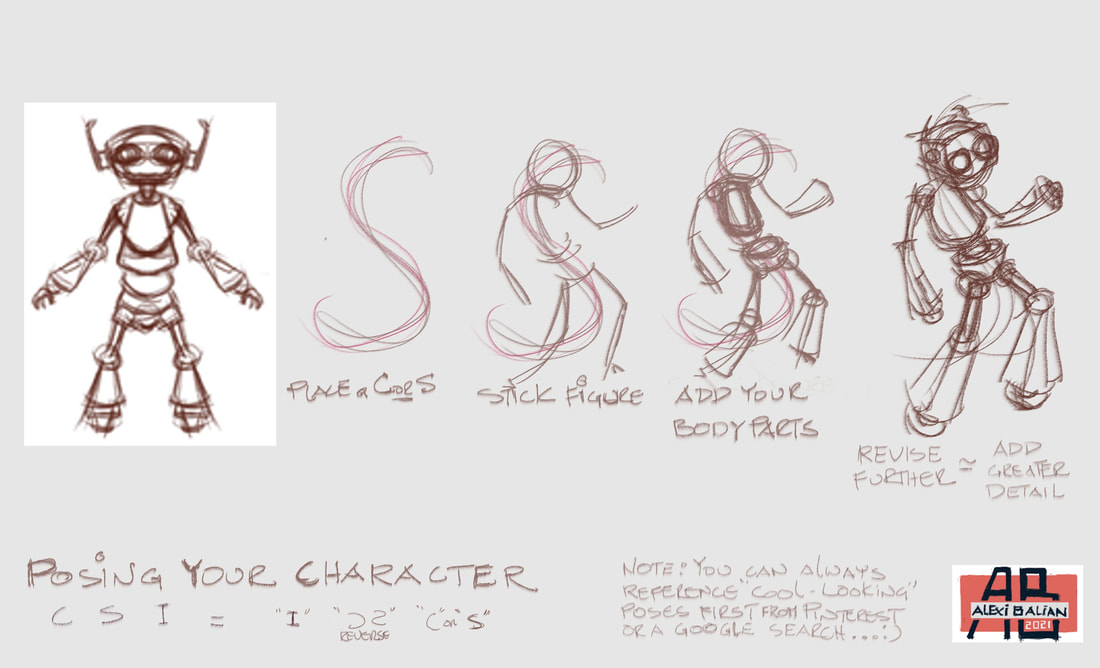
Your last page can have your proposed character design placed, in an action pose (contrapposto), avoid upright stiff poses (remember our C, S and I discussion), shaded(digitally coloured completely optional)with your full biography/ background story of your character.
Create your final package using Google Slides as previously discussed and demonstrated in class. Please remember to add a title page with logo initials, table of contents, visuals relating to your process on your first page. Title bar goes on every page, with your logo initials, typography and visuals applied with hierarchy of information and design principles for page layouts.
Last step, export your slides as One PDF document, with your full name and project title (AlexiBalian_RobotCharacterDesign) .
3D Lesson links are provided further further down the page.
Stage 01:Research & Analysis (1 Day)
As per all our projects
Make connections to the items you downloaded and use those elements as a starting point for your Robot character Design
Stage 01a:Create a background Story of your Character (Day 1 to Day 2- evolved from your Research)
What is the purpose of your character, develop the background story and identity.
Further points to consider:
Is your Robot for a movie, a show, a domestic helper robot, make up a Background story- It will help you tremendously in the Design Process
Stage 02:Elements that Make Up the Whole (1 Period of Class Time)
Draw simplified shapes from your reference page, robot parts that interest and inspire you to eventually incorporate into your Character Design Process.
Stage 03:Concept Sketches "4-2-1" (2 Periods of Class Time)
Building on your research, references, drawn body parts, and also the background story of your character, this is where you start working on producing thumbnail sketches. Start with Four initial ideas, evolve it to Two, then One, so that you can further refine in in the next stage.
Please enjoy this process, let your imagination run wild...:)
Stage 04:Further Refinement (1 to 2 Periods of Class Time)
At this stage, you can work on the One character design that you like most and further develop it, by adding details, parts, as much revisions and details to best connect with the background story of your robot character.
For example, as far as my own robot, this is the stage where I will be exploring if my robot has a telescopic mid section, that could raise and bend the upper body of my bot. I am thinking of adding a Utility Belt, Jet Pack, as well as a Backpack since this is a First Aid Robot. I may spend a bit more time refining what the face looks like, the connections between all body parts, remembering each time for me to draw my character many times over, as opposed to adding and then erasing every change I make.
Stage 05:Proposed Character Design & Final Package (2 to 3 Periods of Class Time)
Your last page can have your proposed character design placed, in an action pose (contrapposto), avoid upright stiff poses (remember our C, S and I discussion), shaded(digitally coloured completely optional)with your full biography/ background story of your character.
Create your final package using Google Slides as previously discussed and demonstrated in class. Please remember to add a title page with logo initials, table of contents, visuals relating to your process on your first page. Title bar goes on every page, with your logo initials, typography and visuals applied with hierarchy of information and design principles for page layouts.
Last step, export your slides as One PDF document, with your full name and project title (AlexiBalian_RobotCharacterDesign) .
3D Lesson links are provided further further down the page.
My Submission for this Assignment
360 Turntable Rotation (Last item to be delivered.
In-Class Demonstrations


Blender Supporting 3D Lessons
Robot Design 3D Modelling Lessons (Please follow the 3 Below before you go any further)
|
|
|
|
Blender Robot Refinement
|
|
|
Blender Mirror 3D Parts and Last Refinement before Colour and Camera
|
|
|
Once you finished Modelling your Robot, the last 2 steps are to add Colour to your Parts, Lighting, and a Camera to export a Movie file.
|
|
|
Previous roll-out of the same assignment